PocketBase is a new and innovative backend solution built in Go that allows us to build web and mobile applications without having to worry about the backend infrastructure. With PocketBase, you get a ready-to-use embedded database (SQLite) with real-time subscriptions, built-in authentication, a simple and user-friendly dashboard UI, and a REST API that can be accessed from any web or mobile app. One of its key advantages is its open-source codebase, making PocketBase highly extensible. Developers have full control over the code and can customize it to fit their specific needs.
Setting up PocketBase is pretty simple - all you have to do is to download the PocketBase Go package from the official site https://pocketbase.io/docs. Once you’ve extracted the zip file you should be able to see the pocketbase file. This is the main application file which contains the PocketBase backend.
To start the PocketBase application run the following console command in the extracted directory:
./pocketbase serveThis will start the PocketBase server on port 8090. If you navigate to http://127.0.0.1:8090 directly you won’t be able to see much - a small JSON error will be shown:
{ "code": 404, "message": "Not Found.", "data": {} }This is the public PocketBase page. By default it serves simple JSON error but If you want to showcase your product or show documentation of any sorts you can create a pb_public folder in the same folder that your pocketbase file is located and serve static content from there.
Now that you’ve successfully started the PocketBase server navigate to http://127.0.0.1:8090/_/ to see the Admin Dashboard. If this is your first time accessing the Admin Dashboard it will prompt you to create your first admin account. If everything goes well you should be redirected to the Admin Dashboard home page.
Navigating within the PocketBase Admin Dashboard is quite simple. There are 3 main sections:
Collections: This section contains everything related to managing your collections. From creating new content collections to modifying existing ones and creating relationships between them.
Logs: This screen has an overview of the app logs. Here you can check out which API endpoints were accessed at what time and by which user. Additional information like user IP address, User Agent, Auth etc. can be seen here;
Settings: Admins can modify application settings like mail configuration, application name and URL, set file storage option, add auth providers etc. from this section of the Admin Dashboard;
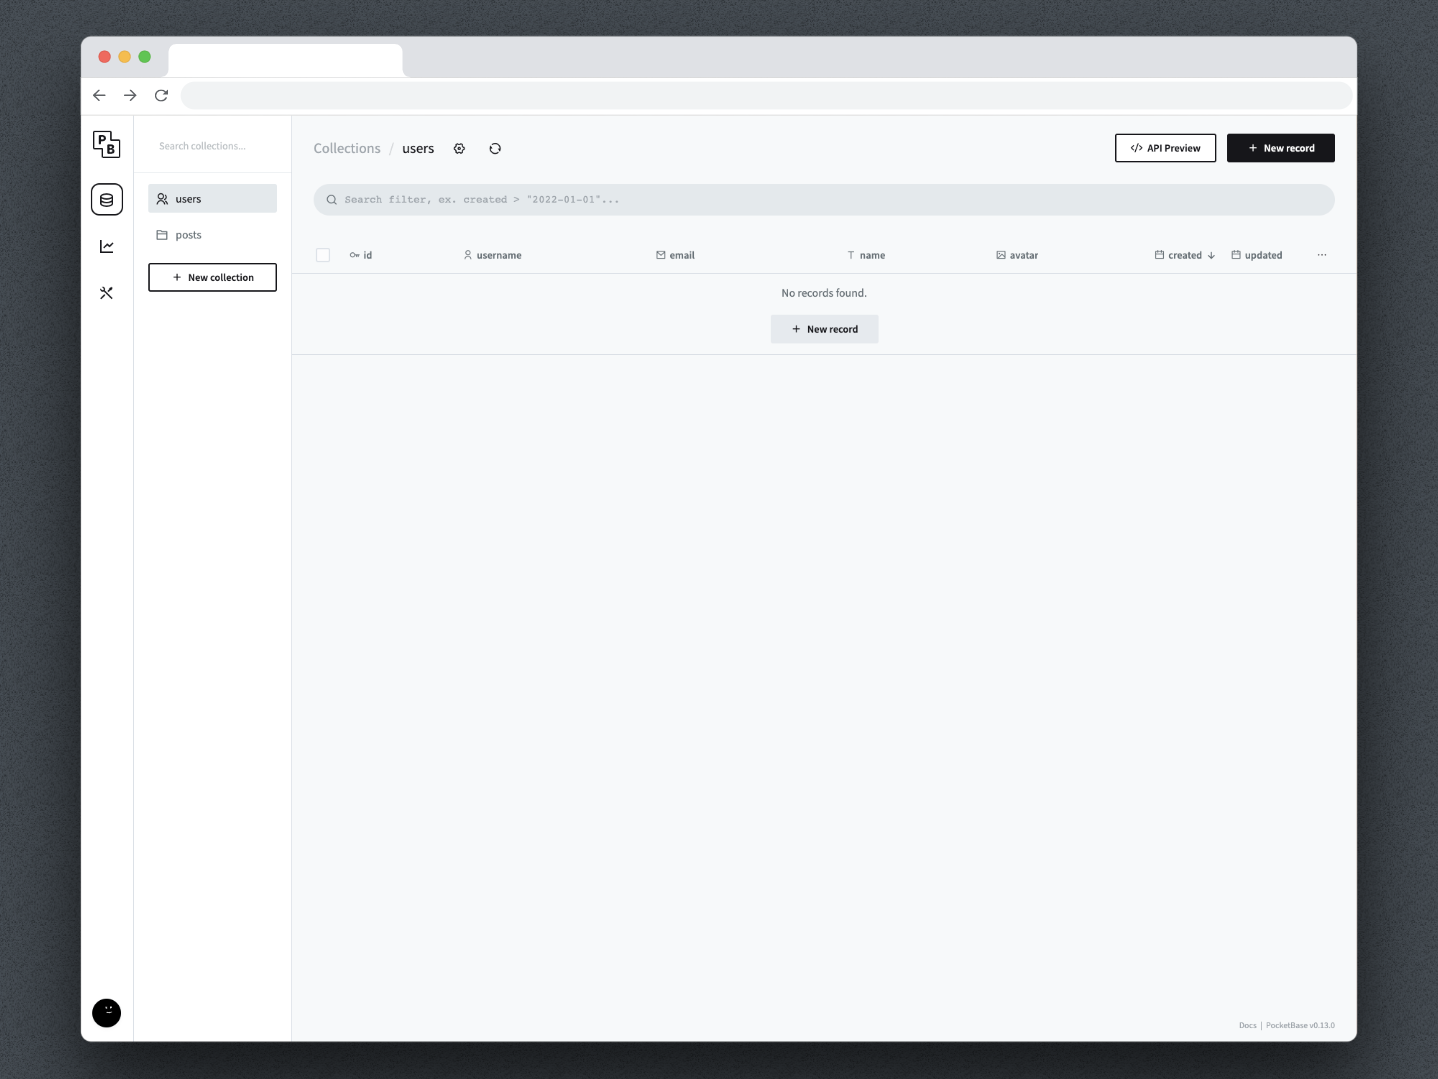
PocketBase uses Collections to organize and manage your application data. Basically they are plain SQLite tables that are automatically generated and contain the columns that you specify as fields within the Admin Dashboard.
By default PocketBase has two collections - users and posts. If you navigate to the posts collection you’ll be able to see the fields (or if you prefer columns) that this collection has. You’ll notice that besides the built in columns: id, created and updated, this collection contains one more field - title. Let’s update this collection and add a new field author that will have 1:1 relationship to the users collection.
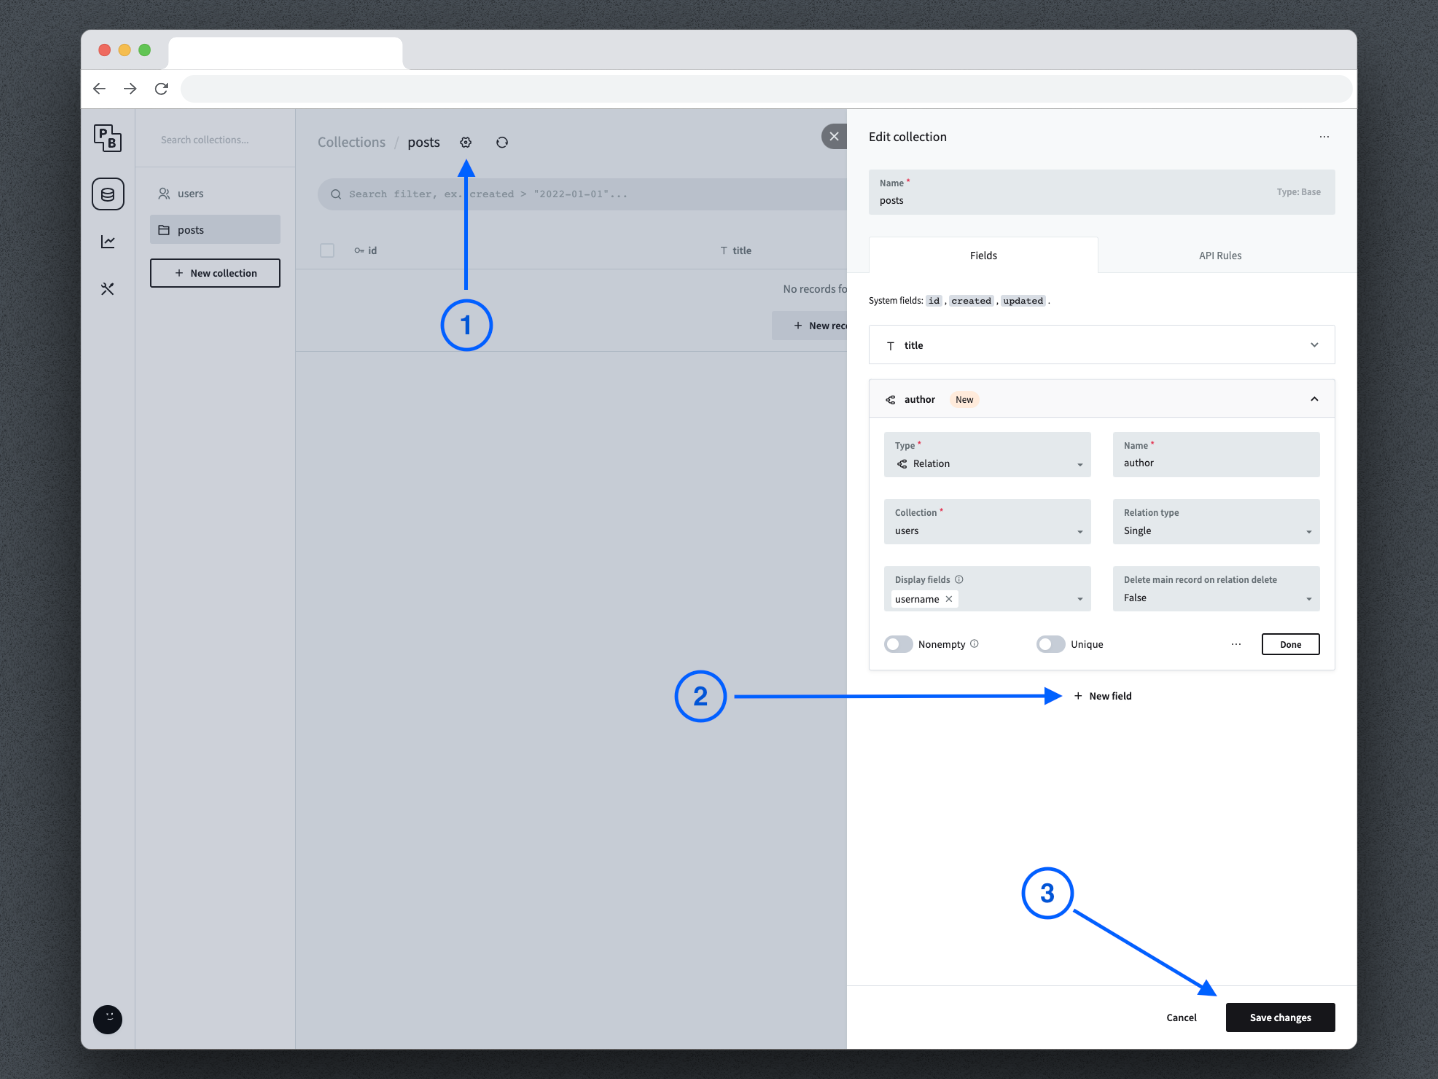
To update the collection model press the settings cog icon next to the name of the collection (top section) and press the “+ New field” button to create a new field. Make sure to select the type of the field to be “Relationship” and select the users collection from the Collection dropdown menu. Optionally, you can select which field name to show from the user model when listing all of the records in the posts collection.
Now that you’ve extended the posts collection with the author field lets create several records in the users collection. Navigate to the users collection, press the “New Record” button and add a couple of users.
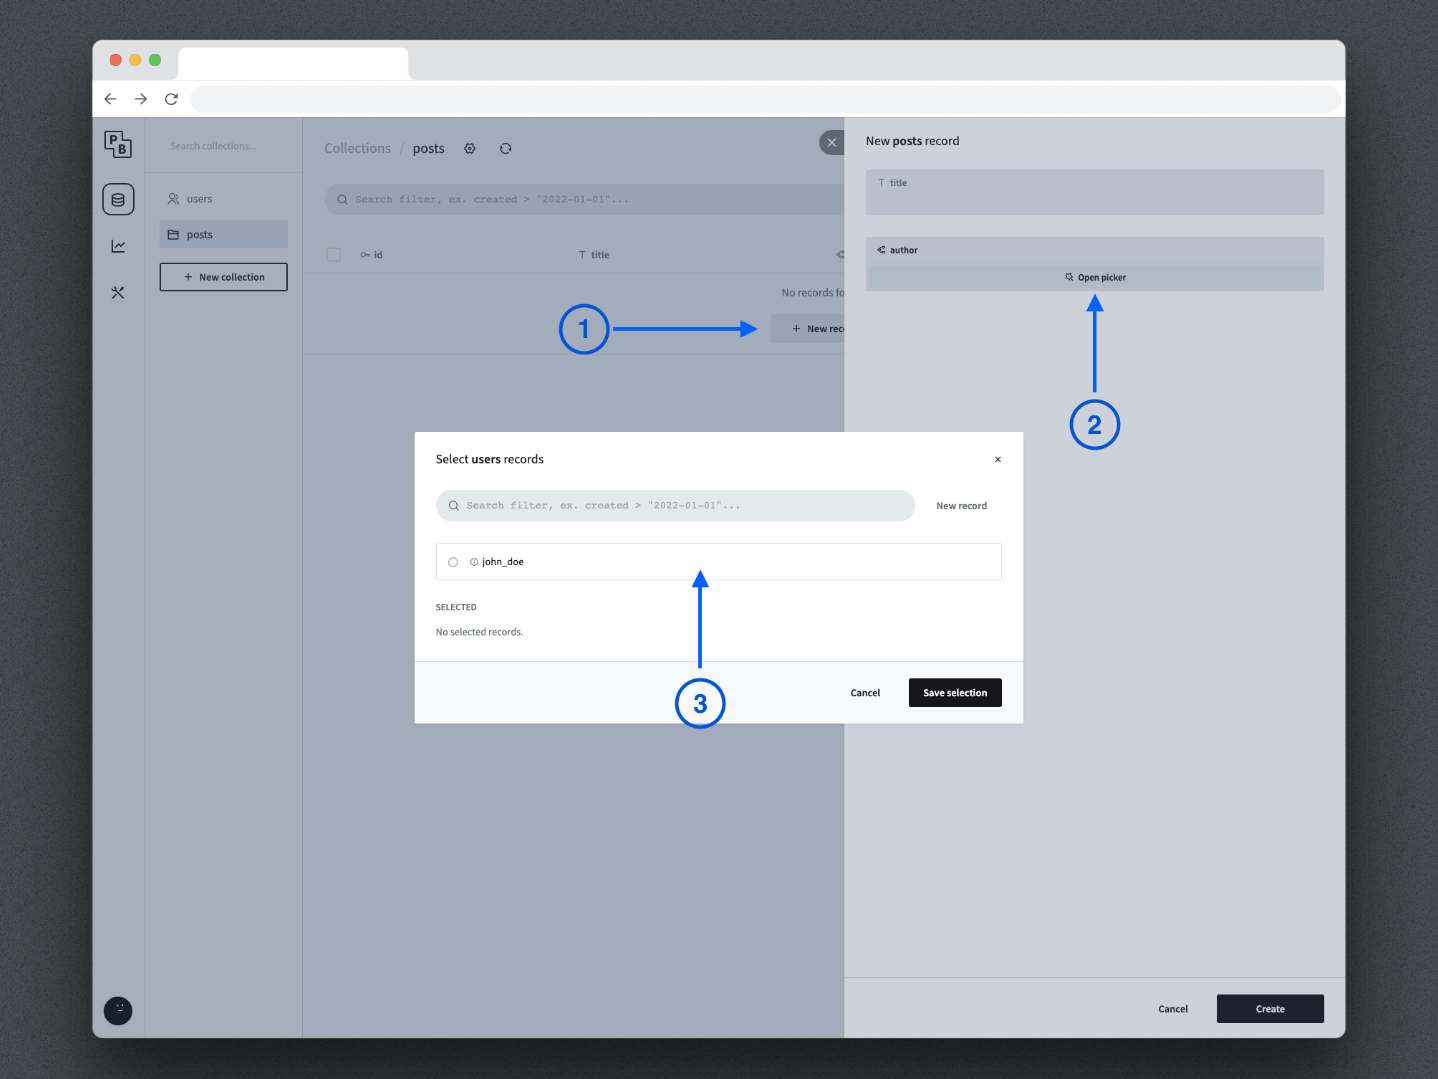
You can go back to the posts collection now and add a new record. Since you’ve set a 1:1 relationship with the users collection you’ll notice that the new author field you’ve created has a records picker. Select which user record you want as the author of this article and create your first post.
Now that you have created our very first post record you can try to access it via the REST API by navigating to http://127.0.0.1:8090/api/collections/posts/records. You’ll notice that the API will return a 403 error stating that only PocketBase admins can perform this action:
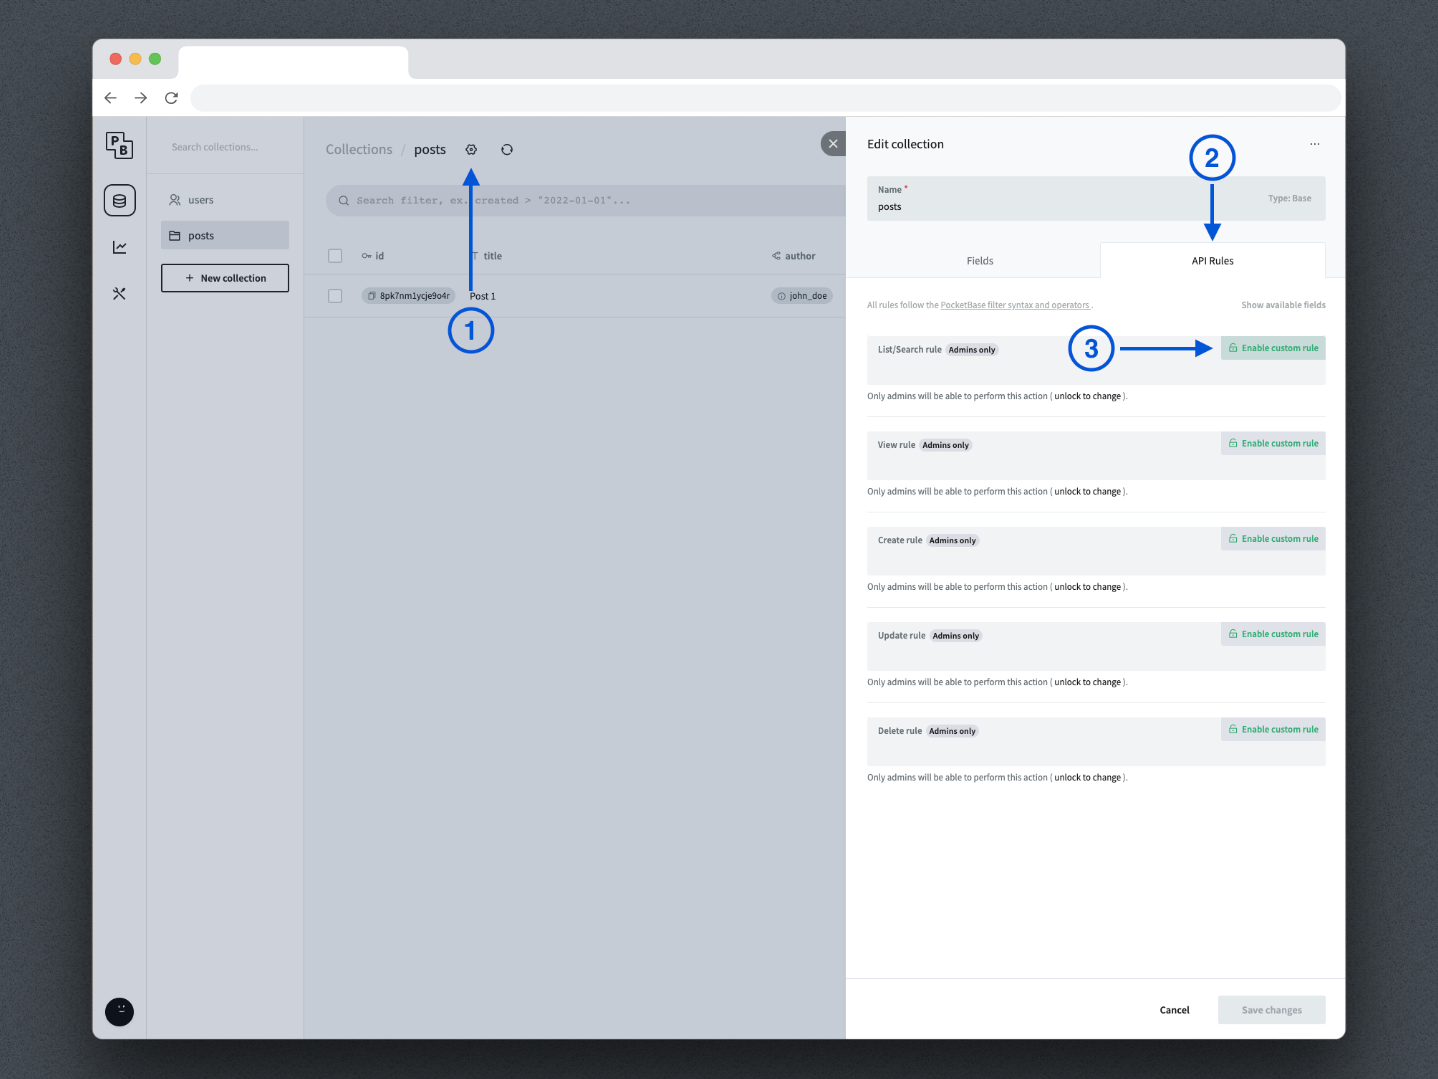
{ "code": 403, "message": "Only admins can perform this action.", "data": {} }PocketBase by default restricts collection access so only its admin can access it. If you want to make actions towards your posts collection accessible to anonymous users you’ll have to set it up by using the Collection API Rules settings. You can access them by pressing the Collection settings cog icon next to its name, select the API rules tab and for the “List/Search rule” action press the “Enable custom rule” button. This will enable us to list all records for the posts collection for anonymous users.
Feel free to play around with the API Rules options for each action - you can find more information on this topic in the official PocketBase documentation.
If you try to navigate to the same API URL as before (http://127.0.0.1:8090/api/collections/posts/records) you’ll notice that it will return a JSON list of the posts collection records. This JSON file contains the records themselves and other useful information like current page, records listed per page, total number of records etc.
Easiest way of interacting with your PocketBase backend instance is by using the JavaScript SDK. Before you start, let’s set up our React app with Create React App (CRA). Create your new CRA project by running the following commands:
npx create-react-app my-pocketbase-frontend
cd my-pocketbase-frontend
npm start
Now that you have your React app up and running you need to install the `pocketbase` package to handle all interactions with our PocketBase backend instance. To do this run the following command in your terminal:
npm install -s pocketbaseLet’s update the `src/App.js` file next and add our PocketBase code:
import React from "react";

// Import the pocketbase package you just installed
import PocketBase from "pocketbase";

function App() {
  // Create new state variable that will contain all of our
  // blog posts. By default it should be an empty array
  const [posts, setPosts] = React.useState([]);

  // Create new PocketBase instance with the URL pointing
  // towards our pocketbase backend. If run it locally
  // the URL below should do. Make sure to set the proper
  // port (8090 is default) as well.
  const pb = new PocketBase("http://127.0.0.1:8090");

  // This function will fetch all of our blog posts
  // from the pocketbase backend. The getList method
  // takes three arguments: page, limit and options. The
  // page argument is the page number you want to fetch.
  // The limit argument is the number of items you want to
  // fetch per page. The options argument is an object
  // that can contain additional options. In this case you
  // want to expand the author field so you can display the
  // author's name in our blog post. The expand option
  // takes a string or an array of strings. If you want to
  // expand multiple fields you can pass an array of strings.
  const fetchPosts = async () => {
    try {
      const results = await pb.collection("posts").getList(1, 50, {
        expand: "author",
      });
      setPosts(results?.items);
    } catch (error) {
      // Oops, something went wrong!
      console.log(error);
    }
  };

  // Call the fetchPosts function when the component mounts
  React.useEffect(() => {
    fetchPosts();
  }, []);

  return (
    <div className="blog-posts">
      <h1>Blog</h1>
      {posts?.map((post) => (
        <div key={post.id}>
          <h2>{post.title}</h2>
          <small>{post?.expand?.author?.name}</small>
          <hr />
        </div>
      ))}
    </div>
  );
}

export default App;
If you refresh the page you’ll observe that all of our blog posts (limited to 50 per page) will be returned from the PocketBase instance. However, the author name will not be shown here:
<small>{post?.expand?.author?.name}</small>This is due to the API Rules that the users collection has by default. If you navigate back to the users collection in your PocketBase Admin Dashboard and enter its settings you will see that by default only signed in users can list or view themselves.
In the image below there is an example of the default API Rules for the users collection. To show information about the author of the blog posts you need to update the second entry here labeled “View rule” and remove the API Rule.
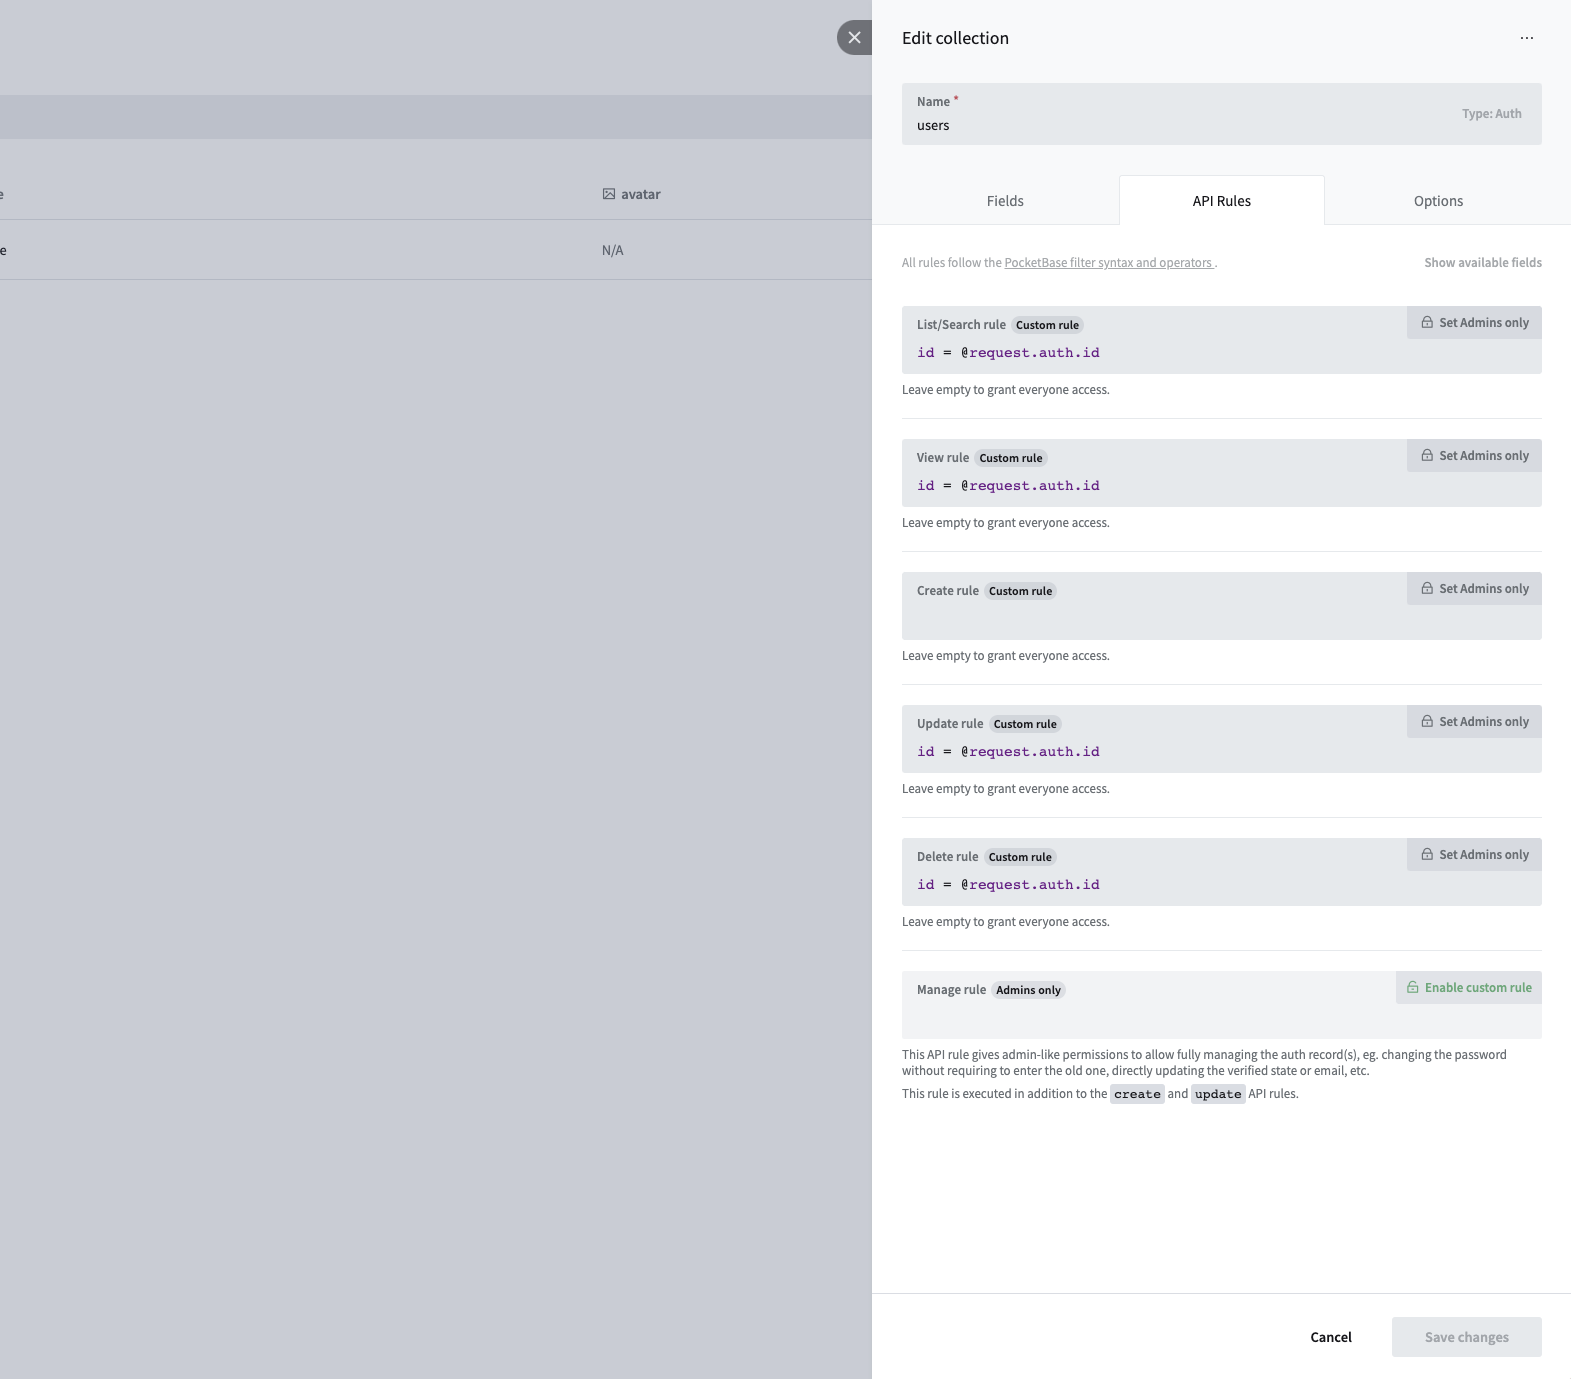
After saving your changes you can go back to the React app and reload the page. Now it should show the author name next to the post title.
You might have already noticed that every collection has a small “API Preview” button in its top right corner. If you press it you’ll get an extensive documentation on using the JavaScript SDK to list, create, update and delete records in that collection.
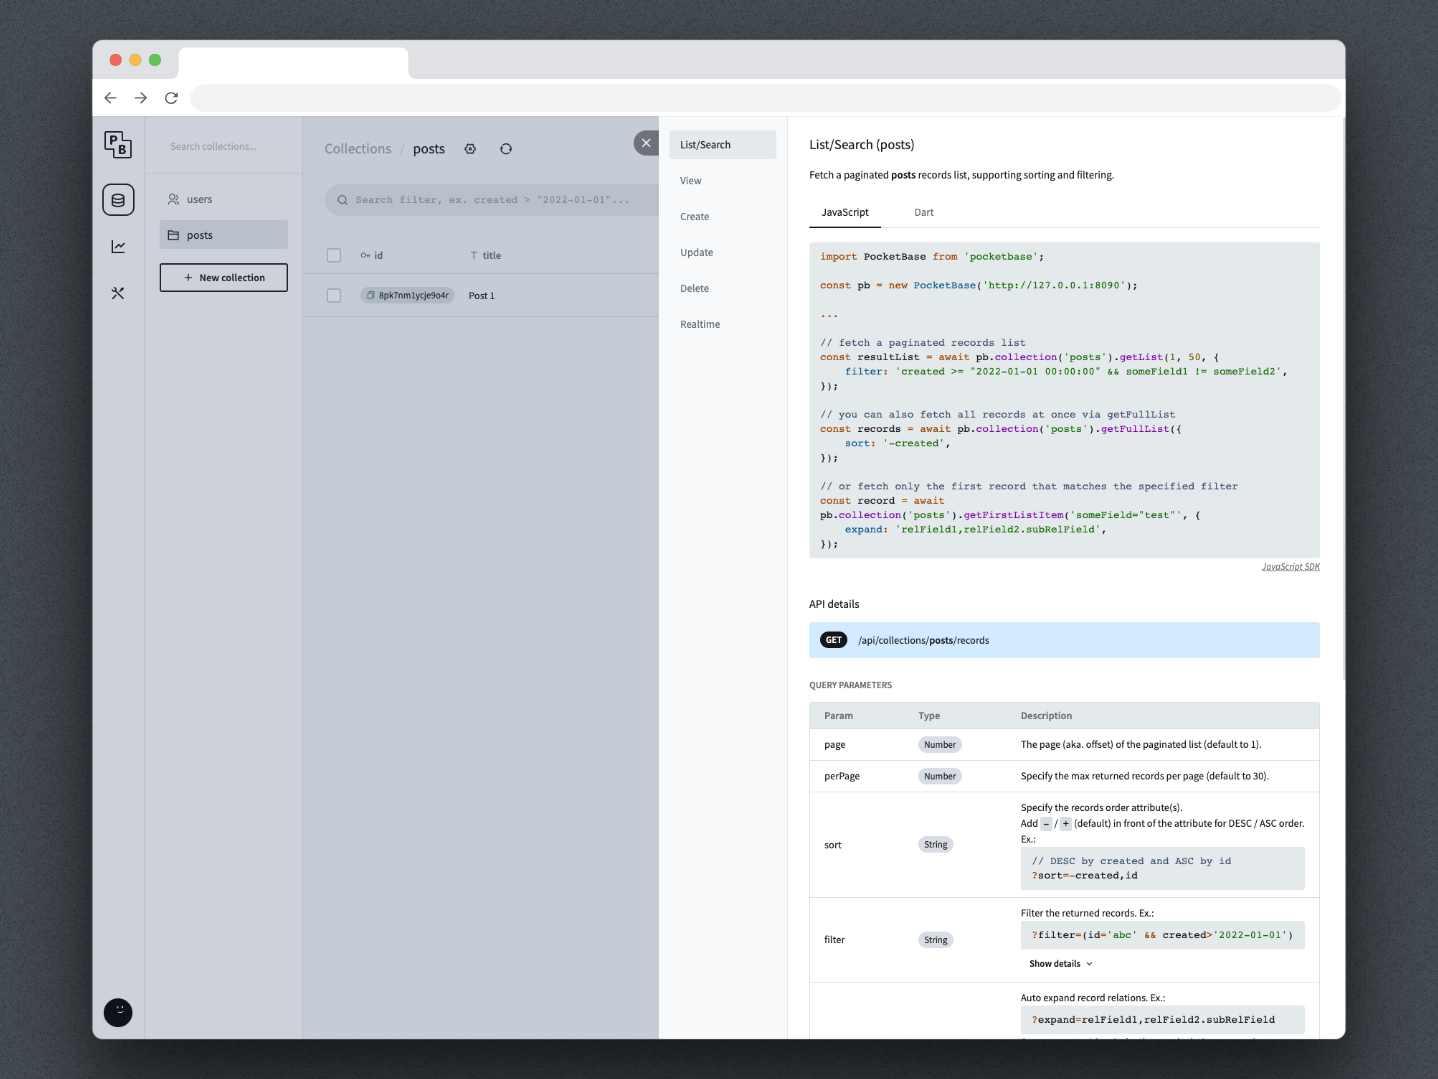
Also, you can refer to the official PocketBase documentation for more information on using the JavaScript SDK.
Overall, PocketBase provides a powerful, scalable, and flexible backend solution for your next small to medium project. With its easy-to-use interface, REST API and user authentication, you can set up and manage collections and records quickly and efficiently.
With its great documentation and growing community PocketBase has great potential of becoming a popular and widely adopted platform for building and managing data for mobile and web applications.